|
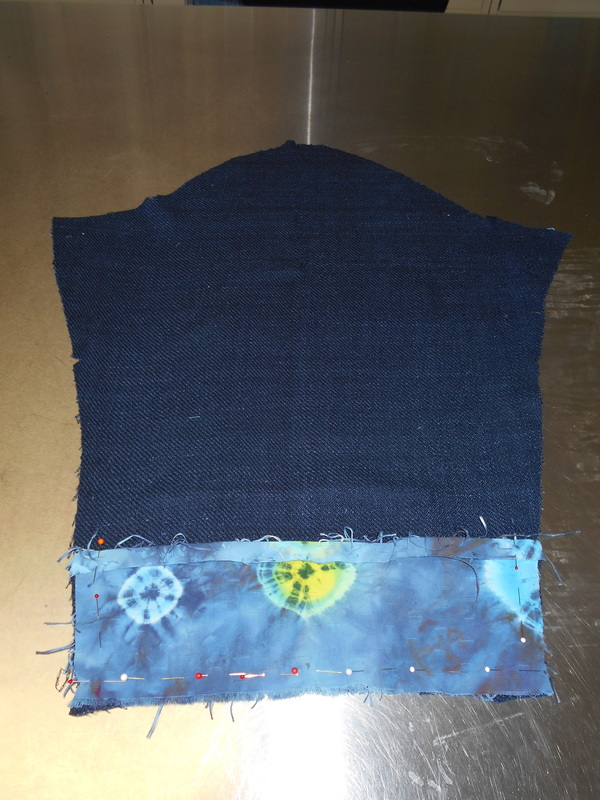
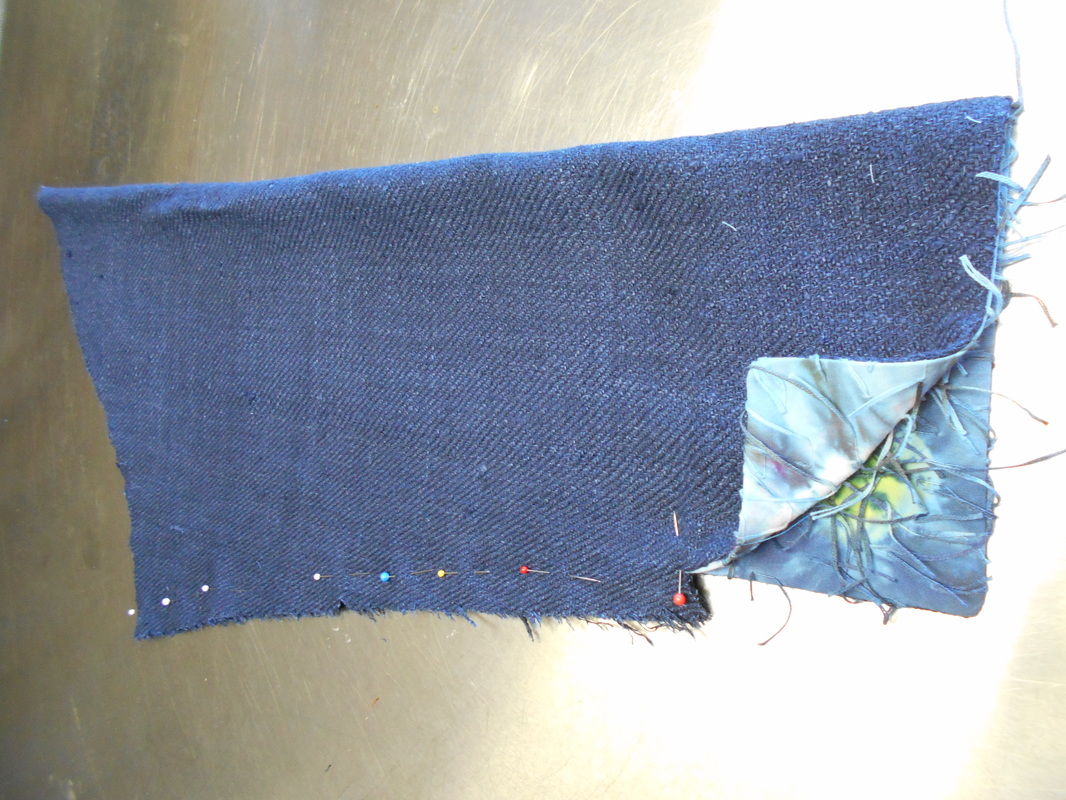
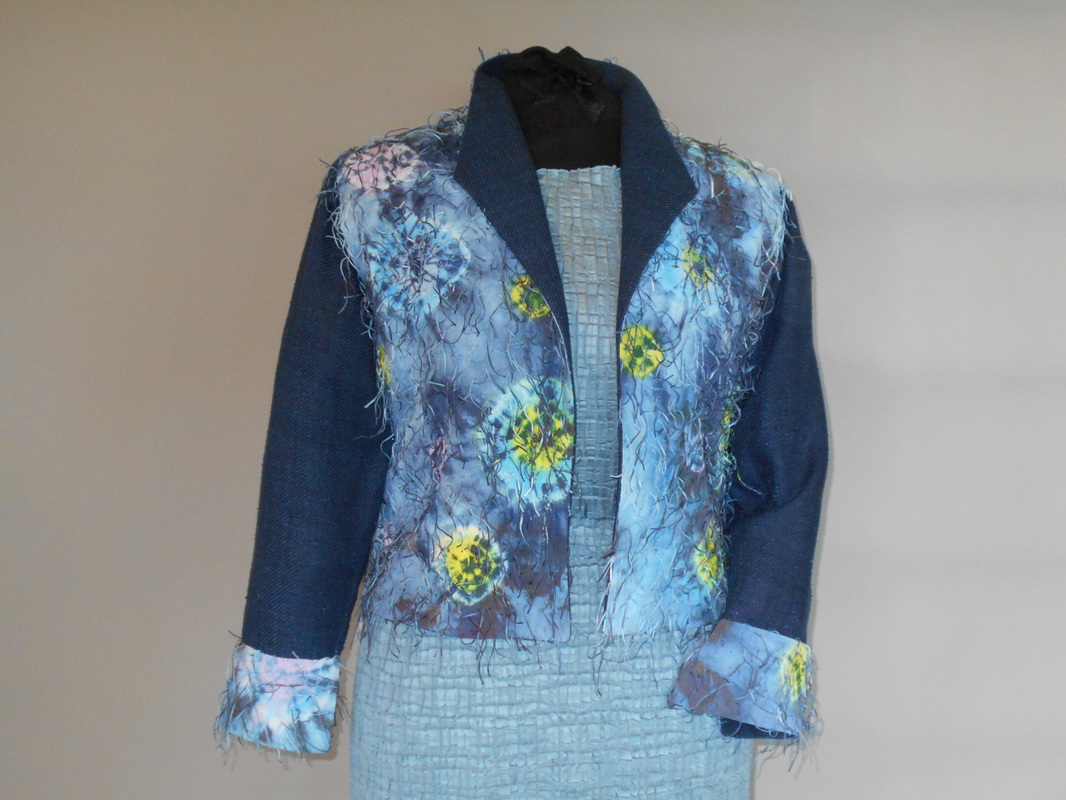
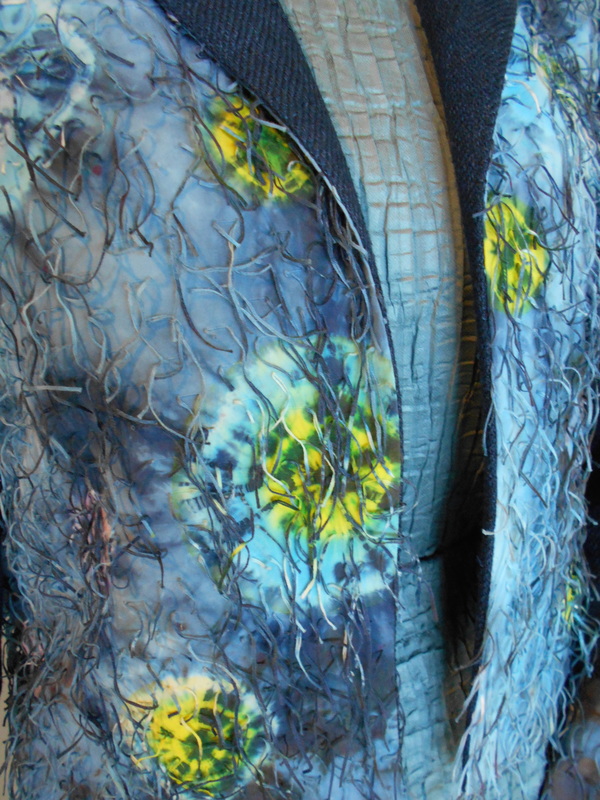
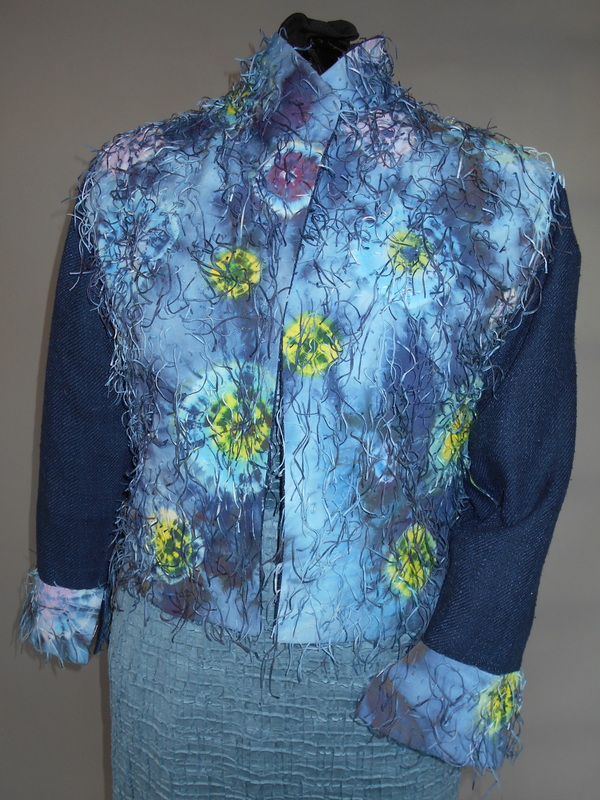
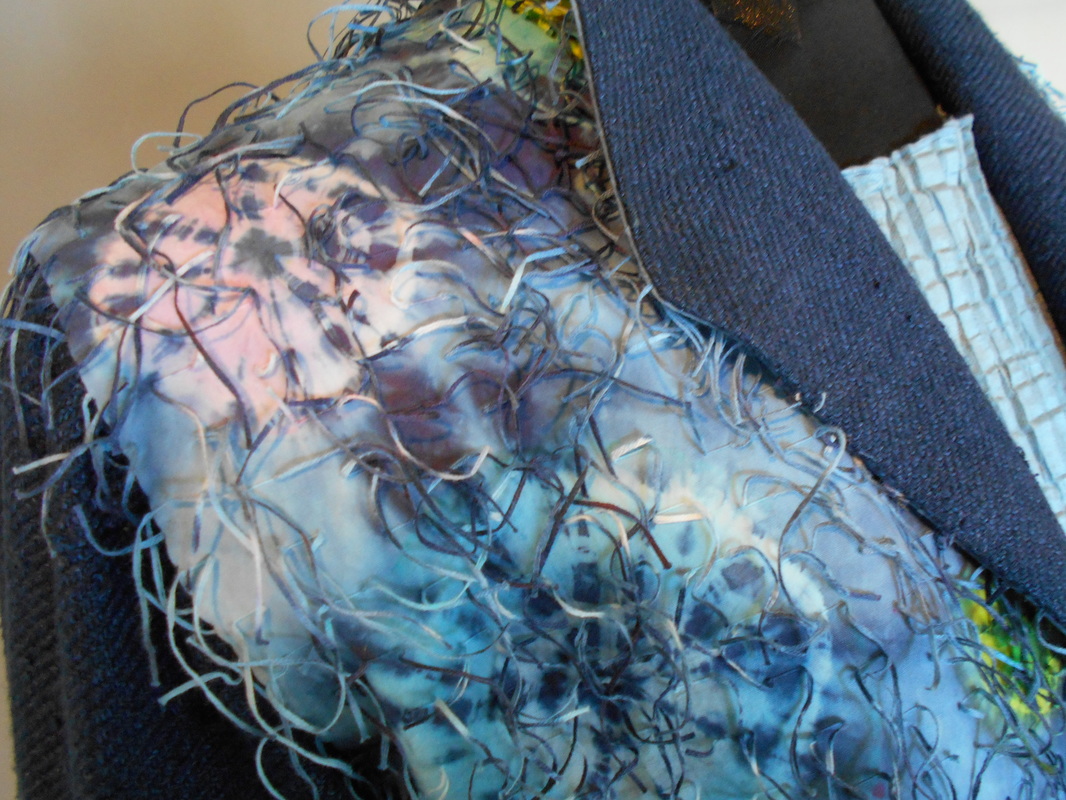
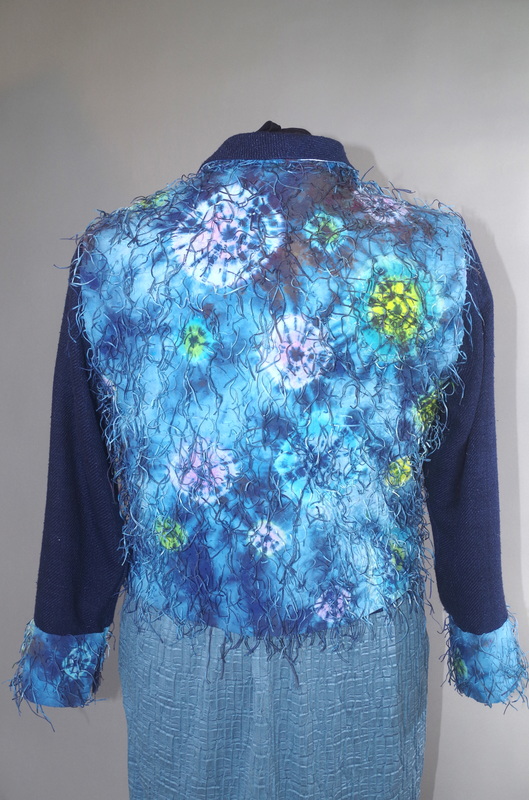
Fabric purchased at Nuno in Tokyo after Shiva paint stick stenciling and ice dyeing with Procion MX. The high contrast wiped out the pastel Shiva designs. Now what? 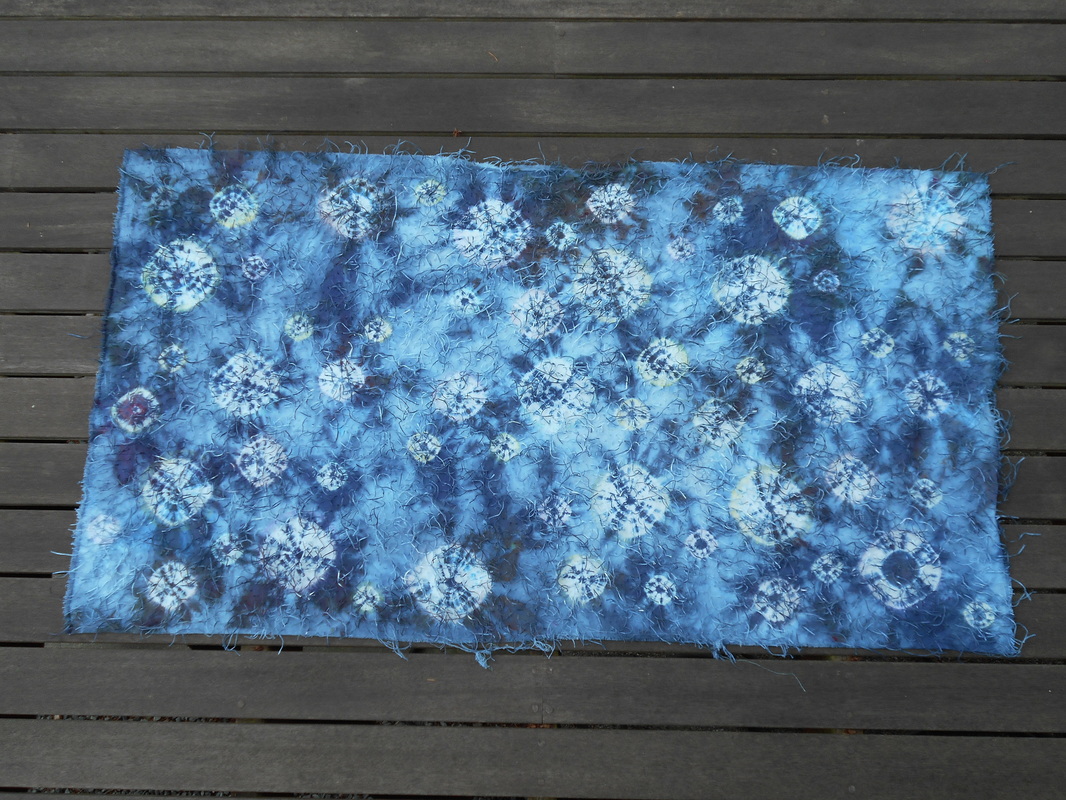 Fabric after painting the shibori designs with dye. Yellow, turquoise and pink 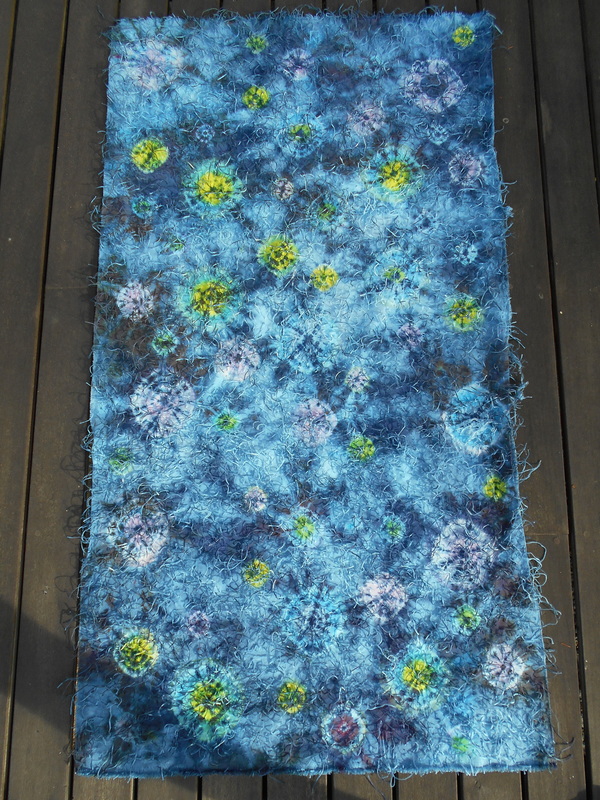 So, here I was with a very interesting piece of fabric but so little of it. Only 51x28, oy veh! I mulled over the possibilities in my head for a while and then decided I needed to play with paper dolls again. I reduced the size of the available piece to scale, copied it multiple times to cut and paste it in a variety of ways to come up with the vest or jacket pattern that made the most sense. No. 1. I tried a jacket version that would allocate a 12" wide strip cut from the short side (front edge) for trimming the top of the sleeves. But that would require adding a contrasting band on the front edges in order to have enough to go around the body. No. 2. I only cut the equivalent of a 6" strip off the short side for the collar of a sleeveless vest. I only got through those two versions, but the process did exactly what was is intended to do: It made me play! I let go of preconceived notions and a-l-l-o-w-e-d the intersection of previous unconnected matrices of thought. (That is Arthur Koestler's definition of creativity. I remember it from 30 years ago because it applies to all areas of human endeavor, from math to music and everything in between.) That's when the fog lifted: I hardly ever wear vests because, if I'm cold enough to wear a vest, my arms will be cold without sleeves. So there! It's gotta be a jacket. But how? And with what? While playing with version No. 2, I remembered an old Vogue jacket pattern I had used before. It occurred to me that I could make the body two-sided, like a reversible vest, and still have sleeves. They would be made from a contrasting fabric that would become the lining/reversible side of the jacket. It is like joining a vest to a jacket! Simple. No problem....! Really? What fabric/color to use for the jacket (which would also be the lining of the vest)? Searching through my stash resulted in rediscovering a beautiful but somewhat loosely woven and therefore tender raw silk twill in a smashing dark indigo color. Perfect! It had been buried for a looong time. Onward... time to play wit paper dolls again. 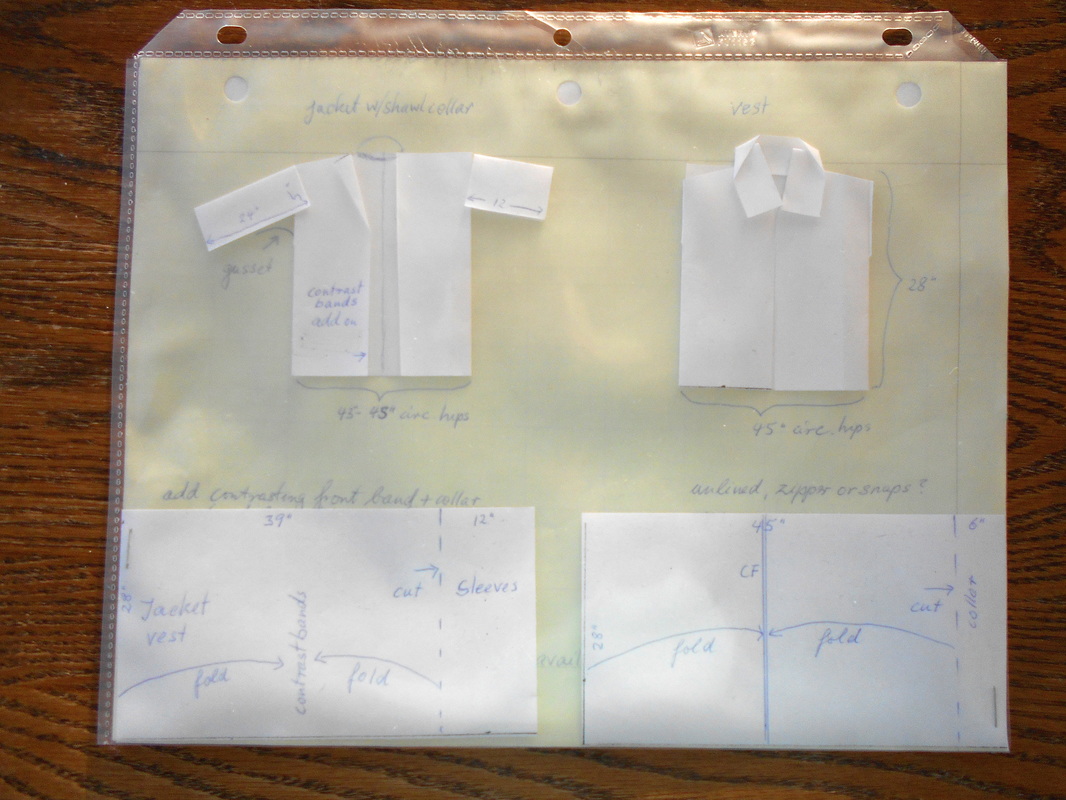 No. 1. I tried a jacket version that would allocate a 12" wide strip cut from the short side (front edge) for trimming the top of the sleeves. But that would require adding a contrasting band on the front edges in order to have enough to go around the body. No. 2. I only cut the equivalent of a 6" strip off the short side for the collar of a sleeveless vest. I only got through those two versions, but the process did exactly what was is intended to do: It made me play! I let go of preconceived notions and a-l-l-o-w-e-d the intersection of previously unconnected matrices of thought. (That is Arthur Koestler's definition of creativity. I remember it from 30 years ago because it makes sense and applies to all areas of human endeavor, from math to music and everything in between.) That's when the fog lifted: I hardly ever wear vests because, if I'm cold enough to wear a vest, my arms will be cold without sleeves. So there! It's gotta be a jacket. But how? And with what? While playing with version No. 2, I remembered an old Vogue jacket pattern I had used before. It occurred to me that I could make the body two-sided, like a reversible vest, and still have sleeves. They would be made from a contrasting fabric that would become the lining of the vest and also the reversible side of the jacket. It is like joining a vest to a jacket! Simple. No problem....! Really? 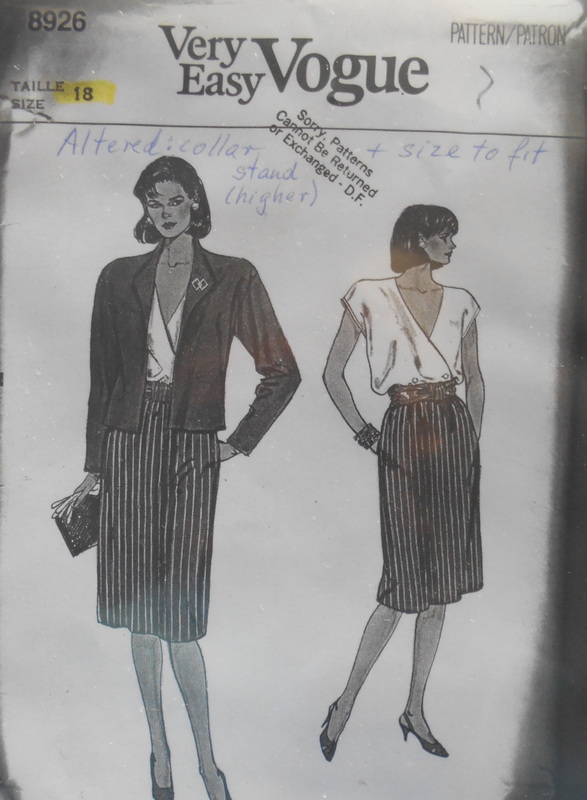 The idea of making a reversible jacket/vest that only had one layer of fabric for the sleeves but two layers for the body required making sleeves with finished seams on the inside as well as on the outside. |
Archives
October 2016
Categories |
Hue & Dye
 RSS Feed